File synchronization is essential for maintaining data consistency, creating backups, and ensuring updated files are available across different locations. Two tools, Copywhiz and Robocopy, can be used for this purpose. Robocopy is a command-line tool included with Windows.
In this blog, we’ll explore how to sync files with each tool through detailed step-by-step guides
Let’s take a look on how to use Copywhiz:
What is Copywhiz?
Copywhiz enhances your file-copy experience by letting you to have more flexibility & control over the file copying and backup process.
Here is how Copywhiz makes file copying a breeze:
- Copy only new or modified files
- Easily pick files by name, extension, folder etc from bunch of folders
- Automatically organize files based on file attributes and metadata
- Copy files to multiple folders/computers
- Copy files from multiple folders and paste them at once
- Sync files between source and destination
- Pick files from multiple folders and compress in single .zip file
- Schedule file backups
- Verify copied files for data integrity
- Retain security attributes of files & folders (ownership/user access)
- Several more hidden nuggets designed to make your file-copy task easier.
Here is a short video for your reference:
Transcription:
1. After you select your files in Copywhiz, go to the destination folder and Choose ‘Copywhiz -> Paste Advanced’.
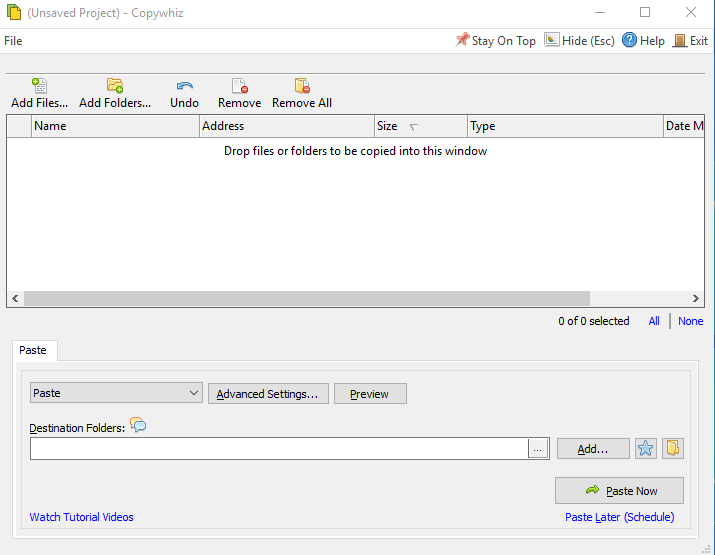
2. The Copywhiz main window will open. Choose the Advanced Settings Tab from there.

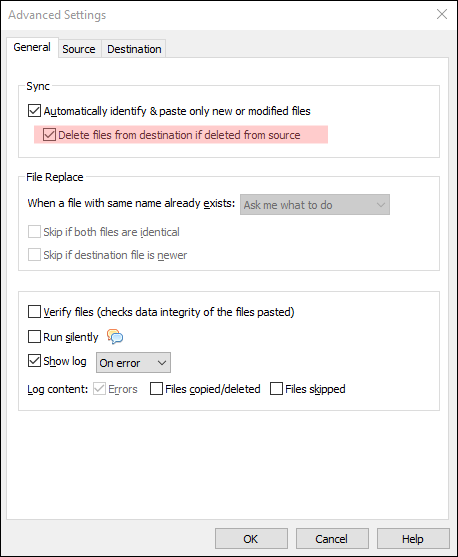
3. Go to the General Tab and choose the option ‘Automatically identify & paste only new or modified files’. After that, select the option ‘Delete files from destination if deleted from source’.

4. Click on OK and proceed with ‘Paste Now’ option. The files will be pasted and the folders will be set to sync.
5. Save the project to run it again in the future.
The next time you make any changes in the source folder, run the saved project file. The folders will sync and the changes will be reflected in the destination folder as well.
We will take a look at how to use Robocopy to sync files between source and destination folder.
Step-by-Step Guide to Using Robocopy
- Open Command Prompt or PowerShell
- Press
Win + S, type “cmd” or “PowerShell,” and press Enter.
- Press
- Basic Sync Command
Run the following command to synchronize a source folder with a destination folder:cmdCopy codeRobocopy "C:\SourceFolder" "D:\DestinationFolder" /MIR/MIR: Mirrors the source to the destination (adds, updates, and deletes files as needed).
- Exclude Files or Folders
To exclude specific files or folders:cmdCopy codeRobocopy "C:\SourceFolder" "D:\DestinationFolder" /MIR /XF "file.txt" /XD "Temp"/XF: Excludes files by name or extension./XD: Excludes folders.
- Log File Generation
Create a log file to record synchronization details:cmdCopy codeRobocopy "C:\SourceFolder" "D:\DestinationFolder" /MIR /LOG:"C:\LogFile.txt" - Automate with Task Scheduler
- Create a
.batfile with the Robocopy command. - Open Task Scheduler (
Win + S, search “Task Scheduler”). - Schedule the
.batfile to run at desired intervals.
- Create a
Conclusion
Copywhiz provides simplicity and convenience for everyday tasks.
Learn more about Copywhiz. Download the free trial from here.
For short tutorial videos, Check out this page.
Subscribe to our YouTube channel for interesting videos.
Check out our other cool products.
Have a good day!
Thanks :)