Excluding specific folders when copying files or backing them up is an essential feature. This is done to avoid copying large redundant files, to save disk space and also to save time. Fortunately, tools like Copywhiz and TeraCopy provide efficient ways to manage file transfers while allowing users to exclude unwanted folders.
What is Copywhiz?
Copywhiz enhances your file-copy experience by letting you to have more flexibility & control over the file copying and backup process.
Here is how Copywhiz makes file copying a breeze:
- Copy only new or modified files
- Easily pick files by name, extension, folder etc from bunch of folders
- Automatically organize files based on file attributes and metadata
- Copy files to multiple folders/computers
- Copy files from multiple folders and paste them at once
- Sync files between source and destination
- Pick files from multiple folders and compress in single .zip file
- Schedule file backups
- Verify copied files for data integrity
- Retain security attributes of files & folders (ownership/user access)
- Several more hidden nuggets designed to make your file-copy task easier.
Using Copywhiz:
Watch a short video depicting this feature:
Video Transcription
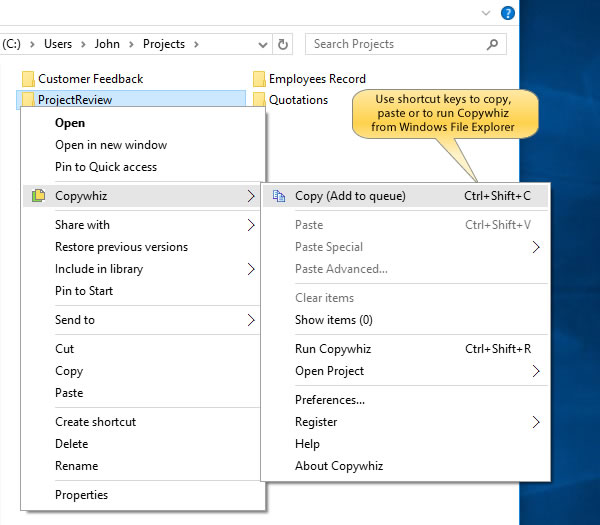
1. Select files using Windows Explorer, right-click on them and choose Copywhiz->Copy from the menu as shown below :
2. Go to the destination folder, right-click inside the folder and select Copywhiz–>Paste special–>Paste files by name or type as shown below:

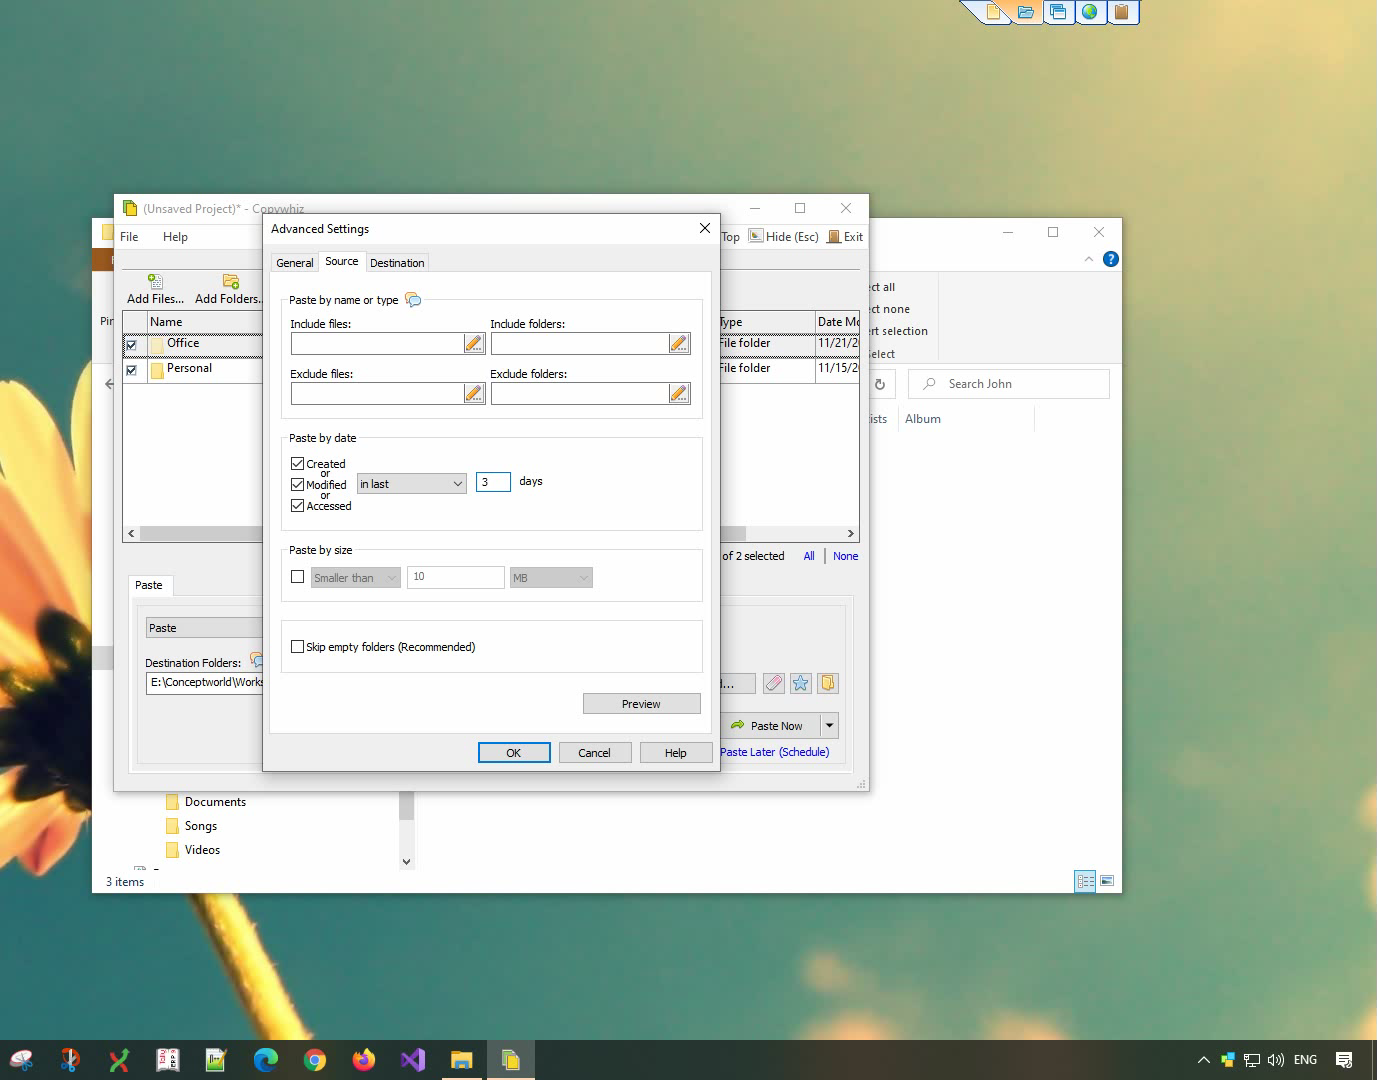
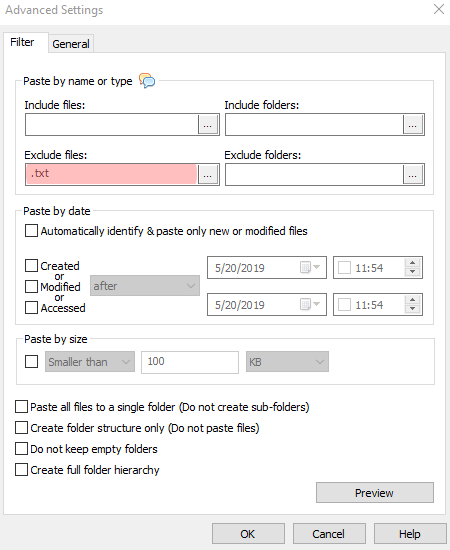
3. The Advanced Settings dialog box will open. You can include or exclude files/folders to be copied by typing their names, file extensions, or folder names. You can also preview the list of files that will be copied and files that will be skipped by clicking on the Preview button. After confirming, press the Ok button in the Advanced Settings dialog box. All the required files will be copied successfully.
Using Teracopy:
Steps to Exclude Folders in TeraCopy
- Download & Install TeraCopy
- If you haven’t already, download and install TeraCopy from its official website.
- Launch TeraCopy
- Open TeraCopy and select the files and folders you want to copy.
- Manually Exclude Unwanted Folders
- Unfortunately, TeraCopy does not provide a built-in feature to exclude specific folders directly. You will need to manually remove unwanted folders from the list before starting the copy process.
- Copy Files
- Once you have selected only the required folders and removed the unnecessary ones, proceed with the copy operation.
Conclusion
If you need more control over your file transfers, including the ability to exclude specific folders, Copywhiz is the better option.
Copywhiz lets you to choose which type of files to copy & which to ignore i.e, it lets you to do ‘Selective File Copy’.
Pick only those files that are important & avoid files that are not required (Eg. Files that occupy too much space) with Copywhiz. Easily filter files by name, extension, folder, etc. from a bunch of folders.
Complete big file copy tasks with few clicks & save manual effort with Copywhiz.
Thanks for reading till the end :)