Copying files and folders to multiple destination folders in Windows using an Xcopy alternative replacement tool

People who generally have the habit of taking multiple backups need to follow the lengthy process of copy, paste, copy, paste, and so on. This is not only tiring and boring but also very time-consuming. They would, therefore, want to copy the files and paste them all at once in all the destinations.

Let us find out how this is possible with the Windows Xcopy tool, and an alternative software, Copywhiz.

What is Copywhiz?

Copywhiz enhances your file-copy experience by letting you to have more flexibility & control over the file copying and backup process.

Here is how Copywhiz makes file copying a breeze:

  • Copy only new or modified files
  • Easily pick files by name, extension, folder etc from bunch of folders
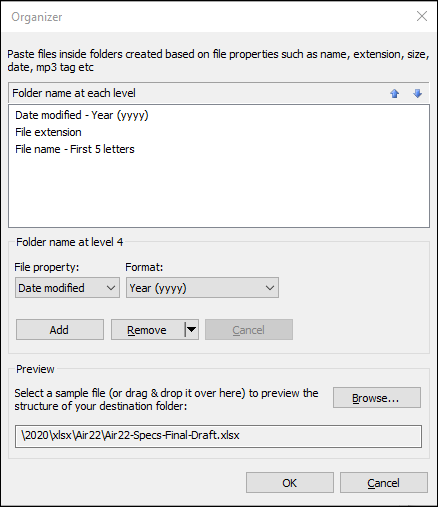
  • Automatically organize files based on file attributes and metadata
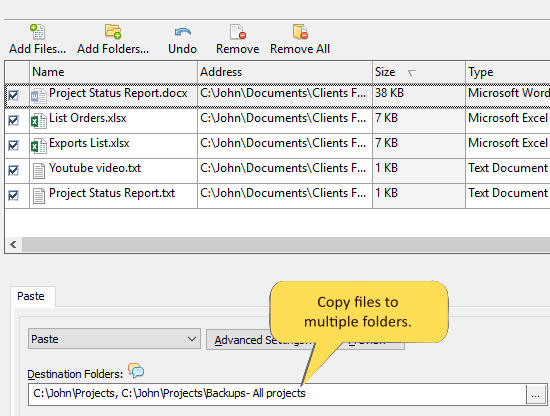
  • Copy files to multiple folders/computers
  • Copy files from multiple folders and paste them at once
  • Sync files between source and destination
  • Pick files from multiple folders and compress in single .zip file
  • Schedule file backups
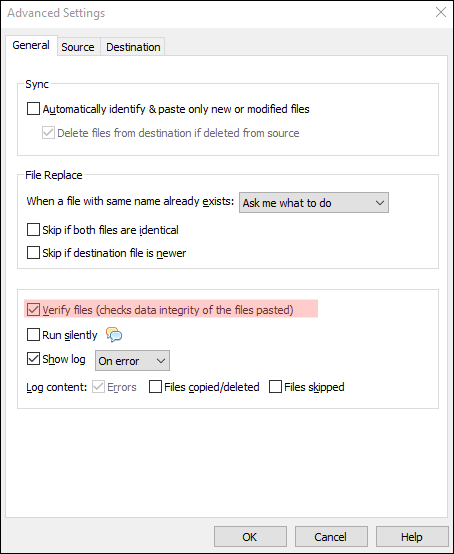
  • Verify copied files for data integrity
  • Retain security attributes of files & folders (ownership/user access)
  • Several more hidden nuggets designed to make your file-copy task easier.
Steps to copy files to multiple destinations

Using Xcopy

The Xcopy command Xcopy Source [Destination] /s copies files including all the sub-folders. We will use the For loop to copy files to multiple destinations using this command.

For Ex: To copy the file “project.docx” into the folders “personal” and “office” we need to run the below command:

Xcopy /s
For %%a in (
“D:\backup\project.pdf”) do (
xcopy /s “%%~a” “d:\temp\personal”,”%%~a” “d:\temp\office”)

However, using Xcopy commands are confusing, especially for ordinary users.

Let me now show you an easier and straightforward way.

Using Copywhiz

Watch a short video that tells you how to do this:

For more tutorial videos, check out this page.

Video Transcription

1. Select the files you wish to copy from it’s Source folder and right-click on it and choose Copywhiz–>Copy as shown below:

2. Go to the destination folder, right-click in it and select Copywhiz–>Paste Advanced. The advanced settings dialogue box will now open.

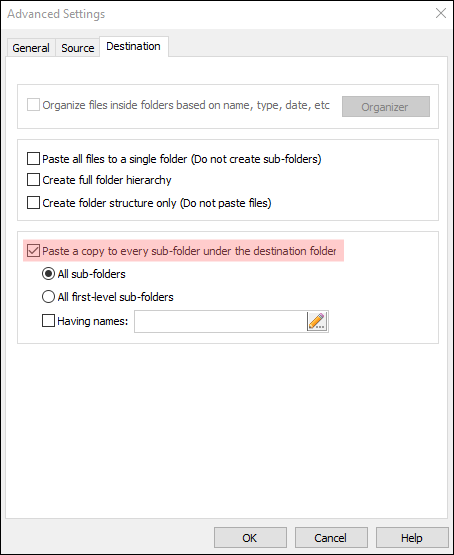
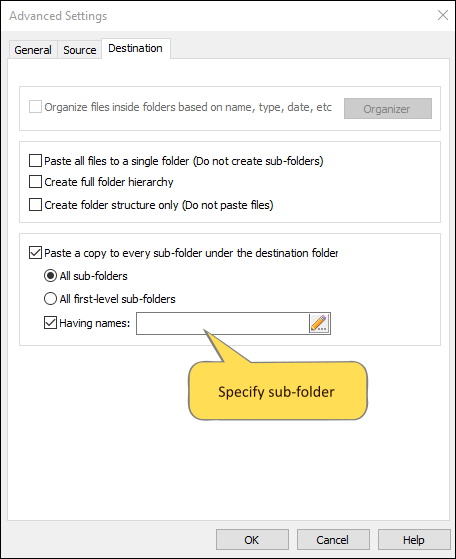
3. Type the name of the folders in which you want the files to be copied and click on Paste Now.

4. The files will instantly copy to all your mentioned folders.

Not just that, Copywhiz even lets you copy files to multiple computers. This is especially useful when you want to share the same files to multiple systems.

You can even use date variables such as %year%, %month%, %day%, %hour% & %minute% as a part of the folder address to create new destination folders each time. That means you can create new folders instantly while copying and do not have to go to different destinations and create folders each time before copying.

This is wow!

The most significant advantage of using Copywhiz is that you can take automatic backups of your files and folders! Read more about it here:

Subscribe to our YouTube channel for regular updates and interesting videos!

Learn more about Copywhiz.

Download the free trial from here.

Check out our other cool products.

Have a good day.

Thanks for taking the time to read :)

Exclude files based on their last access in Windows using a Robocopy alternative replacement tool

There may be a set of files you wouldn’t have used for a long time. Since you do not access them that frequently, it makes no sense to copy them every time with your other regular files.

But we often do not know how to exclude or filter such files from being copied. This is not practically possible manually.

But this is now possible. Let us find out how to do it using Robocopy, a Windows tool an an alternative software, Copywhiz.

What is Copywhiz?

Copywhiz enhances your file-copy experience by letting you to have more flexibility & control over the file copying and backup process.

Here is how Copywhiz makes file copying a breeze:

  • Copy only new or modified files
  • Easily pick files by name, extension, folder etc from bunch of folders
  • Automatically organize files based on file attributes and metadata
  • Copy files to multiple folders/computers
  • Copy files from multiple folders and paste them at once
  • Sync files between source and destination
  • Pick files from multiple folders and compress in single .zip file
  • Schedule file backups
  • Verify copied files for data integrity
  • Retain security attributes of files & folders (ownership/user access)
  • Several more hidden nuggets designed to make your file-copy task easier.

An image depicting one of the features of Copywhiz

Steps to filter files based on their last access

Using Robocopy

The Robocopy command Robocopy Source [Destination] /MAXLAD:n[YYYYMMDD] is used to depict the maximum last access date which means it excludes files unused since ‘n’. Here, n is either days or the exact date whichever you find convenient.

For example: While copying files from the folder “projects” to the folder “backup”, if you want to exclude files that have not been accessed since 10 JAN 2018:

Robocopy c:\projects c:\backup /maxlad:20180110

Similarly, you can even exclude frequently used files from being copied. This is for when you have a large number of unused files that you need to keep aside as a mere record.

Again, Robocopy can do this using the command Robocopy source [destination] /minlad:n[YYYYMMDD], which depicts the minimum last access days which means it will exclude files used since the specified day/date.

For example: If you want to exclude files accessed since 10 JAN 2018:

Robocopy /minlad: [20180110]

will be used.

Even though Robocopy does it for you, these commands are not easy to use. System administrators use it. But, Robocopy is not straightforward for ordinary users.

I will now show you an easier and faster method.

Using Copywhiz

1. Select files using Windows Explorer, right-click on them and choose Copywhiz->Copy from the menu as shown below :

2. Go to the destination folder, right-click inside the folder and select Copywhiz–>Paste Advanced as shown below:

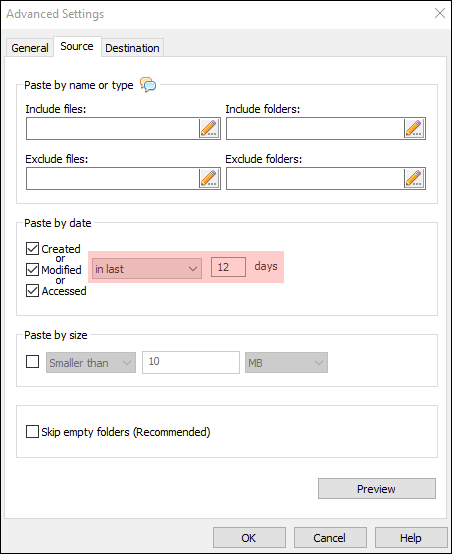
3. Copywhiz Window will open. Click on the ‘Advanced Settings’ button and select “Paste by Date – Accessed” and click ‘OK.’

Conclusion

Copywhiz lets you do all of these with just a few clicks right from Windows Explorer which could have taken several hours if done manually.

The biggest advantage of using Copywhiz is that you can take automatic backups of your files and folders! Read more about it here:

For more tutorial videos, click here .

Subscribe to our YouTube channel for regular updates and interesting videos!

Learn more about Copywhiz.

Download the free trial from here.

Check out our other cool products.

Have a good day.

Thanks for reading till the end :)

Copy files to a new folder (each time) in Windows using a Robocopy alternative replacement tool

This post will tell you how to copy the same files into different folders, automatically, each time in Windows PC.

Why create new folders each time?

  • Whether it’s your critical work documents or a collection of your photos, you never know when there might occur a physical failure of your PC or when you may commit an accidental error.
  • Not to forget that there is always a risk of theft or unforeseen disasters like fire, flood, etc. Adding to the misery is computer viruses which often delete or corrupt your data.
  • It is, therefore, a good idea to take multiple backups, so that the data is recovered if any of the above situations occur.
  • Also, multiple versions of file backups are important because users can continually update files and might need to restore a file from different points in time.

This is not possible with the Windows Robocopy tool .

You could use an alternative software, Copywhiz instead which is really easy and straightforward.

What is Copywhiz?

Copywhiz enhances your file-copy experience by letting you to have more flexibility & control over the file copying and backup process.

Here is how Copywhiz makes file copying a breeze:

  • Copy only new or modified files
  • Easily pick files by name, extension, folder etc from bunch of folders
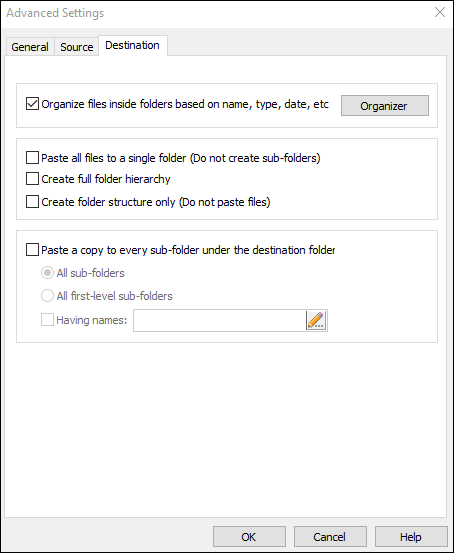
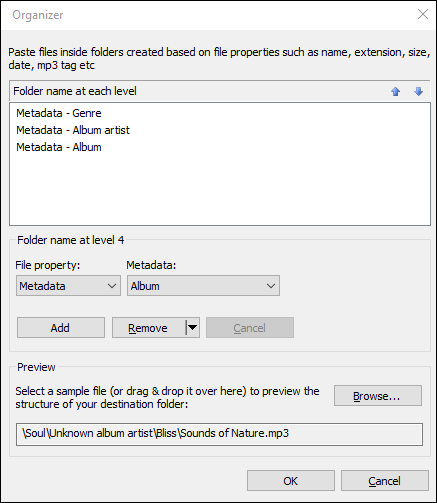
  • Automatically organize files based on file attributes and metadata
  • Copy files to multiple folders/computers
  • Copy files from multiple folders and paste them at once
  • Sync files between source and destination
  • Pick files from multiple folders and compress in single .zip file
  • Schedule file backups
  • Verify copied files for data integrity
  • Retain security attributes of files & folders (ownership/user access)
  • Several more hidden nuggets designed to make your file-copy task easier.

An image depicting one of the features of Copywhiz

Steps to copy files in new folder each time

Watch a short video regarding this feature:

Video Transcription

1. Select the files to be copied from the Source folder and right-click on it and choose Copywhiz–>Copy as shown below:

 'title=

2. Right-click inside the destination folder where you wish to copy the files and select Copywhiz–>Paste Advanced:

3. Copywhiz window will open with the destination folder already selected. You can suffix the destination folder with %date% or %datetime% to add the current date to the folder name.

4. Once the variables are added, click on ‘Paste Now,’ and it will automatically create a new folder based on the current date.

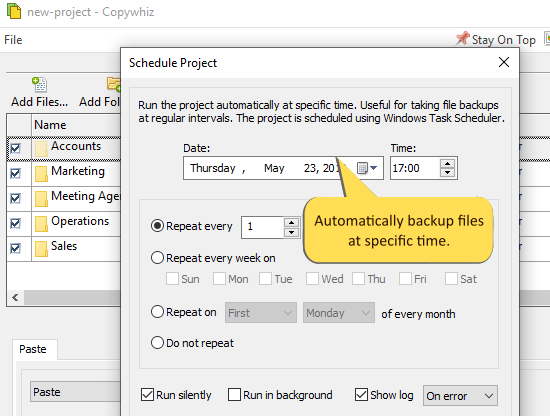
5. You can save the selected files as a Copywhiz project and schedule a backup of the same set of files by clicking on ‘Paste later (Schedule)’ button.

Once clicked, the following Window will appear that will let you set your preferred backup frequency.

After setting your preferred frequency, click on ‘Schedule Now’ so that Copywhiz automatically runs the projects at a specified time for taking backups.

Conclusion

Copywhiz is an alternative that lets you create a new destination folder (date-wise) for every file backup. This way, you can ensure that multiple versions of your backups are maintained.

It uses Windows Task Scheduler to schedule your backups. Configure Copywhiz to copy files at a particular time. Using Copywhiz’s scheduling capability, you can back up your data every week, every day, or even every hour.

For more tutorial videos, check out this page.

Learn more about Copywhiz. Download the free trial from here.

Have a good day!

Thanks for your time :)
If you found this post useful, please do share it.

Pause & resume file copy operation in Windows using a Robocopy alternative replacement tool

This post will tell you how to pause file copying process and resume it back from the same point in Windows!

Why would we want to pause file copying tasks?

There can be many scenarios. When we wish to modify certain files before the files are copied, we may want to pause. To improve system performance, we may want to pause the file copy operation. Or when some files are in use or when the destination drive is temporarily in a disconnected state. And the list goes on.

This is currently not possible with Windows Robocopy tool.

However, you can use an alternative software Copywhiz.

With Copywhiz, if you wish to hold the file copying process, you can pause file copying and then resume it again from the same point. Very easy and straightforward for anyone to try.

What is Copywhiz?

Copywhiz enhances your file-copy experience by letting you to have more flexibility & control over the file copying and backup process.

Here is how Copywhiz makes file copying a breeze:

  • Copy only new or modified files
  • Easily pick files by name, extension, folder etc from bunch of folders
  • Automatically organize files based on file attributes and metadata
  • Copy files to multiple folders/computers
  • Copy files from multiple folders and paste them at once
  • Sync files between source and destination
  • Pick files from multiple folders and compress in single .zip file
  • Schedule file backups
  • Verify copied files for data integrity
  • Retain security attributes of files & folders (ownership/user access)
  • Several more hidden nuggets designed to make your file-copy task easier.

Steps to pause and resume file copy

Watch a short video depicting this feature:

For more tutorial videos, check out this page.

Video Transcription

Copywhiz lets you to pause and resume file copy in Windows. Also, it lets your system to automatically shut down/hibernate/sleep after a file copy. You can even silently copy files without prompts & error messages. A Log file is generated too. Not just that, you can even change the file copy speed to improve performance and view the progress of each file being copied.

The biggest advantage of using Copywhiz is that you can take automatic backups of your files and folders! Read more about it here:

Subscribe to our YouTube channel for interesting videos!

Learn more about Copywhiz.

Download the free trial from here.

Check out our other cool products.

Have a good day.

Thanks for your time :)

Copywhiz Review

We received a beautiful feedback about Copywhiz from our customer Yacoub.

Here it is.

Copywhiz is one of the best, if not THE best, tool for organizing files and documents that I have ever used or seen. I have folders and files that date back years, and I have wanted to reorganize into projects without disturbing the originals. I tried this for only a few minutes, and every time I did, all I kept saying was “wow!”. This is an excellent tool for management, lawyers, research… and so many other fields. You really ought to consider marketing this specifically to law firms, especially independent ones (small to medium) and Doctoral Students (research-oriented). Bravo, whoever did this is… I will be trying you other 2 products as soon as I finish this email!

What is Copywhiz?

Copywhiz enhances your file-copy experience by letting you to have more flexibility & control over the file copying and backup process.

Here is how Copywhiz makes file copying a breeze:

  • Copy only new or modified files
  • Easily pick files by name, extension, folder etc from bunch of folders
  • Automatically organize files based on file attributes and metadata
  • Copy files to multiple folders/computers
  • Copy files from multiple folders and paste them at once
  • Sync files between source and destination
  • Pick files from multiple folders and compress in single .zip file
  • Schedule file backups
  • Verify copied files for data integrity
  • Retain security attributes of files & folders (ownership/user access)
  • Several more hidden nuggets designed to make your file-copy task easier.

Thank you so much :)

Learn more about our smart file copy, file backup and file orgnizer app – Copywhiz.

Copy files excluding empty folders in Windows using an Xcopy alternative replacement tool

This post will show you how to exclude empty folders from the file copying process in Windows — thus making it a lot easier while copying all your important files.

Why would someone want to remove empty folders?

Removing the empty folders ensures that you don’t spend more time looking for files inside them. You keep the folder structure clean and relevant.

Let us find out how to do this using the Windows Xcopy tool and an alternative software, Copywhiz.

What is Copywhiz?

Copywhiz enhances your file-copy experience by letting you to have more flexibility & control over the file copying and backup process.

Here is how Copywhiz makes file copying a breeze:

  • Copy only new or modified files
  • Easily pick files by name, extension, folder etc from bunch of folders
  • Automatically organize files based on file attributes and metadata
  • Copy files to multiple folders/computers
  • Copy files from multiple folders and paste them at once
  • Sync files between source and destination
  • Pick files from multiple folders and compress in single .zip file
  • Schedule file backups
  • Verify copied files for data integrity
  • Retain security attributes of files & folders (ownership/user access)
  • Several more hidden nuggets designed to make your file-copy task easier.

Steps to exclude empty folders

Using Xcopy

The Xcopy command Xcopy Source [Destination] /S copies directories and subdirectories except empty ones. This implies that all the folders will be copied except the empty ones.

For Ex: To copy all contents from the folder “projects” to the folder “backup” except the empty folders, the following command line will be used:

xcopy d:\projects e:\backup /S

This command will copy all the folders leaving out those with no files in them.

But these commands are not so easy. System administrators use it, but Xcopy is really hard for ordinary users.

Let me show an easier and straightforward way to do this.

Using Copywhiz

1. Select the files to be copied from the Source folder and right-click on it and choose Copywhiz–>Copy as shown below:

2. Go to the destination folder, right-click inside the folder and select Copywhiz–>Paste Advanced as shown below:

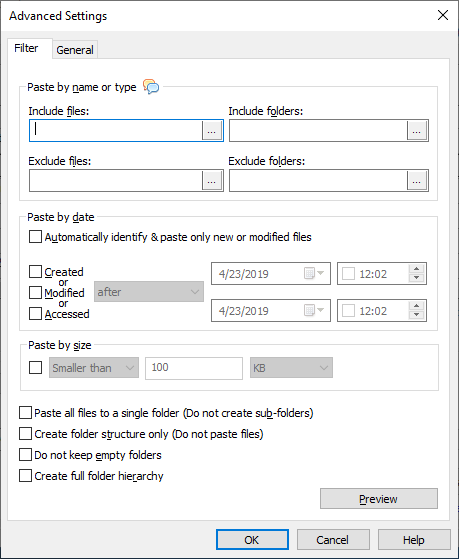
3. Copywhiz Window will open. Click on the ‘Advanced Settings’ button and select “Do not keep empty folders” and click ‘OK.’

4. Click on the “Paste Now” button. Your files would have been copied even before you go to the destination and check for them. This is the added advantage of high speed.

Conclusion

You now know how Copywhiz makes the whole process a lot more fun and easy in just a few clicks.

The biggest advantage of using Copywhiz is that you can take automatic backups of your files and folders! Read more about it here:

For more tutorial videos, click here .

Subscribe to our YouTube channel for regular updates and interesting videos!

Learn more about Copywhiz.

Download the free trial from here.

Check out our other cool products.

Have a good day.

Thanks for staying till the end :)

Copy/Move older files in Windows using a Robocopy alternative replacement tool

This article will help you copy only old files, thereby excluding the newer ones. You have to specify the date/day you want.

Why copy or move older files?

When it comes to dealing with old files, most probably, you wish to move them to another backup device to archive them. Or you want to move to another location to create free space. Copywhiz can help you do this quickly and effortlessly.

Let us look at how this is possible with Windows Robocopy tool, and an alternative software, Copywhiz.

What is Copywhiz?

Copywhiz enhances your file-copy experience by letting you to have more flexibility & control over the file copying and backup process.

Here is how Copywhiz makes file copying a breeze:

  • Copy only new or modified files
  • Easily pick files by name, extension, folder etc from bunch of folders
  • Automatically organize files based on file attributes and metadata
  • Copy files to multiple folders/computers
  • Copy files from multiple folders and paste them at once
  • Sync files between source and destination
  • Pick files from multiple folders and compress in single .zip file
  • Schedule file backups
  • Verify copied files for data integrity
  • Retain security attributes of files & folders (ownership/user access)
  • Several more hidden nuggets designed to make your file-copy task easier.
Paste files by date

An image depicting one of the features of Copywhiz

Steps to copy only older files

Using Robocopy

The Robocopy command:
Robocopy Source [Destination] /MINAGE:N[YYYYMMDD] copies all source files that are older than the existing Destination files.
Note that ‘n’ represents the date which you need to type accordingly.

For Ex: To copy all the files in the directory ‘E:data’ that are older than 1st January 2018 to the folder ‘E:\backup’, the following command line will be used:

Robocopy/ E:\data E:\backup /MINAGE:20180101

Just by looking at the above commands, you can judge that Robocopy commands are not easy to use. System administrators may be able to use it. But, Robocopy is undoubtedly not straightforward for ordinary users.

I will now show you a more comfortable and faster method to do this.

Using Copywhiz

1. Go to Windows File Explorer, select the files from the source folder, right-click and choose Copywhiz–>Copy as shown below:

2. Go to the destination folder, right-click on it and select Copywhiz–>Paste Advanced. The ‘Advanced Settings’ dialogue box will open.

3. Click the “Advanced Settings” Tab. Click on ‘Paste by Date” created or modified or accessed according to your requirements.

4. Now, you can either choose “Paste” or “Paste and delete original (move)” to copy/move your files

Conclusion

What could take several hours if done manually, Copywhiz completes it in few seconds! Just specify the file date type and date range so that the files are copied based on the date criteria.

For tutorial videos, check out this page.

Subscribe to our YouTube channel for interesting videos.

Learn more about Copywhiz. Download the free trial from here.

Have a good day!

Thanks for reading till the end :)

Copying files from different locations to a single destination folder in Windows using an Xcopy alternative replacement tool

This post will explain to you how to copy files from different folders located at different places, into a single folder or location, you want to keep them in.

Why copy everything in a single folder?

Want to share your favorite photos, music, and videos with your friend but have to copy the whole folder while sharing?

You have no option to do this since you fear that without that, you will have to go through the tiring process of going into each folder and search from the long list and select the ones you want one by one. Sounds tiring already.

This is why creating a single folder to store these files is needed. All files will go into a single folder without creating any sub-folders.

Let us look at this using the Windows Xcopy tool and an alternative software, Copywhiz.

What is Copywhiz?

Copywhiz enhances your file-copy experience by letting you to have more flexibility & control over the file copying and backup process.

Here is how Copywhiz makes file copying a breeze:

  • Copy only new or modified files
  • Easily pick files by name, extension, folder etc from bunch of folders
  • Automatically organize files based on file attributes and metadata
  • Copy files to multiple folders/computers
  • Copy files from multiple folders and paste them at once
  • Sync files between source and destination
  • Pick files from multiple folders and compress in single .zip file
  • Schedule file backups
  • Verify copied files for data integrity
  • Retain security attributes of files & folders (ownership/user access)
  • Several more hidden nuggets designed to make your file-copy task easier.

Steps to copy files in a single location

Using Xcopy

Xcopy Source [Destination] /s command lets us to Copy files from different locations to a single destination folder.

For Ex: To copy the files “project.docx” and “logo.png” to a single folder “saved pictures,” the following command line will be used:

For %%a in (
“D:\backup\project.docx”
“D:\project\logo.png”
) do (
xcopy /s “%%~a” “d:\pictures\saved pictures”
)

However, the Xcopy commands are not so straightforward. System administrators may be able to use it. But Xcopy is confusing for ordinary users.

Let us look at a more straightforward and simple way to do this.

Using Copywhiz

Watch a short video that perfectly depicts this:

For more tutorial videos, check out this page.

Video Transcription

1. Select files to be copied from the Source folder and right-click on it and choose Copywhiz–>Copy as shown below:

2. Keep adding files from different folders by clicking on “Copy (Add to queue).” You can see the total number of files copied until now in the “Show Items” menu.

3.Right-click inside the destination folder where you wish to copy the files and select Copywhiz–>Paste . You could even use ‘Ctrl+Shift+V’.

4. All the files copied will be pasted in the destination folder all at once.

This is how Copywhiz lets you select multiple files from various folders and paste them in one desired folder in a very easy and fast manner.

Conclusion

This feature is handy when we have all our music/pictures scattered in different folders that we may want to bring into a single folder. Or we may want to pick only specific types of files & copy them all in one folder.

This also saves you a lot of time.

Subscribe to our YouTube channel for more such interesting videos.

Learn more about Copywhiz. Download the free trial from here.

Have a good day!

Thanks for your time :)
Keep following for more articles to come.

Pause & resume file copy operation in Windows using an Xcopy alternative replacement tool

During your file copy process, you may get a warning for high CPU and disk usage. The best thing would be to pause the copy for a while until the other tasks are completed.

With Copywhiz, if you wish to hold the file copying process, you can pause and then resume right from the point where you paused it. This way, you do not lose the integrity of the file being copied.

This is not possible with Windows Xcopy tool. However, you can use Copywhiz, a file copy software for Windows. It is really easy and straightforward.

What is Copywhiz?

Copywhiz enhances your file-copy experience by letting you to have more flexibility & control over the file copying and backup process.

Here is how Copywhiz makes file copying a breeze:

  • Copy only new or modified files
  • Easily pick files by name, extension, folder etc from bunch of folders
  • Automatically organize files based on file attributes and metadata
  • Copy files to multiple folders/computers
  • Copy files from multiple folders and paste them at once
  • Sync files between source and destination
  • Pick files from multiple folders and compress in single .zip file
  • Schedule file backups
  • Verify copied files for data integrity
  • Retain security attributes of files & folders (ownership/user access)
  • Several more hidden nuggets designed to make your file-copy task easier.

Steps to Pause & Resume file copy using Copywhiz

Watch a short video depicting this feature:

For more tutorial videos, check out this page.

Video Transcription

Copywhiz lets you to pause and resume file copy in Windows. It lets shutdown automatically/hibernate/sleep after a file copy. It even silently copies files without prompts & error messages. A Log file is also generated. You can Change file copy speed to improve performance. Also, view progress for each file being copied.

It is easy to understand and do it, as shown here. Try it out today.

The biggest advantage of using Copywhiz is that you can take automatic backups of your files and folders! Read more about it here:

Subscribe to our YouTube channel for regular updates and interesting videos!

Learn more about Copywhiz.

Download the free trial from here.

Check out our other cool products.

Have a good day.

Thanks for reading till the end :)

Continue file-copying even if error occurs in Windows using an Xcopy alternative replacement tool

While copying a large number of files, we often see a window pop up saying ‘An error occurred while copying.’ Isn’t this very annoying? Wouldn’t it be great if instead of attending to every error message, you could skip that particular type of error and continue with the rest of the copy?

This post will show you how to continue copying your files even when an error occurs. Also, you can skip the same type of error so that you are not prompted each time. You can later review the log to learn why the error occurs.

To understand this better, we will compare Windows Xcopy tool with an alternative software , Copywhiz.

What is Copywhiz?

Copywhiz enhances your file-copy experience by letting you to have more flexibility & control over the file copying and backup process.

Here is how Copywhiz makes file copying a breeze:

  • Copy only new or modified files
  • Easily pick files by name, extension, folder etc from bunch of folders
  • Automatically organize files based on file attributes and metadata
  • Copy files to multiple folders/computers
  • Copy files from multiple folders and paste them at once
  • Sync files between source and destination
  • Pick files from multiple folders and compress in single .zip file
  • Schedule file backups
  • Verify copied files for data integrity
  • Retain security attributes of files & folders (ownership/user access)
  • Several more hidden nuggets designed to make your file-copy task easier.

Steps to continue copying even on error

Using Xcopy

Xcopy Source [Destination] /c command lets us to continue file-copying even if error occurs.

For Ex: To copy files from ‘C:\project’ to the folder ‘D:\Backup‘, by excluding the files with errors, the following command line will be used:

xcopy “C:\project D:\Backup /c

However, Xcopy commands are not easy to use. System administrators may be able to use it. But Xcopy is not for ordinary users.

Using Copywhiz

Watch this short video that depicts this feature:

When copying files, Copywhiz does not stop on error. Instead it lets you retry or skip that particular file & proceed.

Also, if a file is locked (file-in-use) , Copywhiz will wait until you unlock the file. In fact, Copywhiz will show you which program is using the file so that you can close the program in order to continue with file copy.

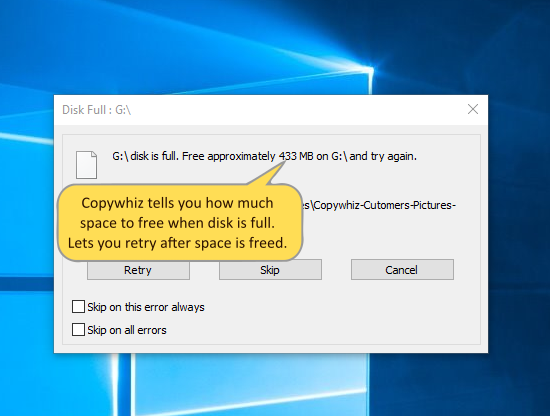
If the disk is full , Copywhiz will show how much space you need to free in order to complete the operation successfully as shown below:

Screenshot Retry Or Skip Files On Error

Now here comes the best part!

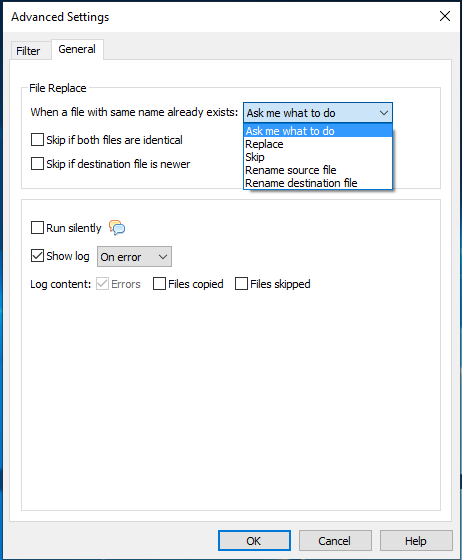
You can configure Copywhiz to run it silently. This means you will no longer be asked any questions when copying files. Also, duplicate files will be replaced by default, and error logs will be generated.

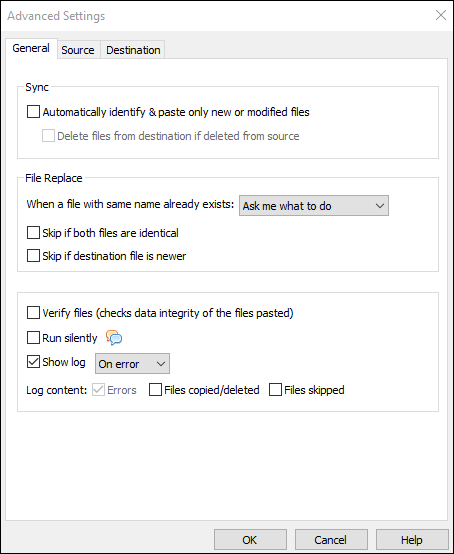
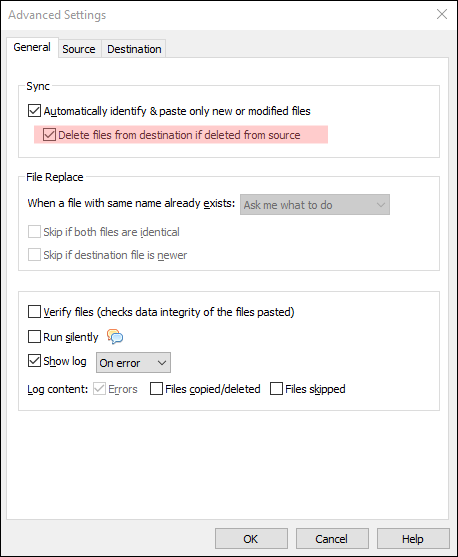
All you need to do is click on the General Tab in the Advanced Settings and select the option “Run Silently.”

Conclusion

You must have now understood how Copywhiz is much easier and faster.

The biggest advantage of using Copywhiz is that you can take automatic backups of your files and folders! Read more about it here:

So why wait? Go try it out today.

For more tutorial videos, click here .

Subscribe to our YouTube channel for regular updates and interesting videos!

Learn more about Copywhiz.

Download the free trial from here.

Check out our other cool products.

Have a good day.

Thanks for reading :)