This article will update you on how to create a new destination folder each time for the files you copy, while copying files in Windows.
Why new folders each time?
It is always advisable for multiple backups of your files. Data loss can happen in many ways; the most common causes are physical failure of your PC, accidental errors, theft, or even natural disasters.
Computer viruses too often delete or corrupt your data. Also, multiple versions of file backups are essential because users might need to restore a file from different points in time.
This is not directly possible with the Windows Xcopy tool.
You can therefore use an alternative software, Copywhiz to do that in an easier and faster way. It is really straightforward and can be understood even by a beginner.
What is Copywhiz?
Copywhiz enhances your file-copy experience by letting you to have more flexibility & control over the file copying and backup process.
Here is how Copywhiz makes file copying a breeze:
- Copy only new or modified files
- Easily pick files by name, extension, folder etc from bunch of folders
- Automatically organize files based on file attributes and metadata
- Copy files to multiple folders/computers
- Copy files from multiple folders and paste them at once
- Sync files between source and destination
- Pick files from multiple folders and compress in single .zip file
- Schedule file backups
- Verify copied files for data integrity
- Retain security attributes of files & folders (ownership/user access)
- Several more hidden nuggets designed to make your file-copy task easier.
Steps to copy files in a new folder each time
Watch a short video on this feature:
For more tutorial videos, check out this page.
Video Transcription
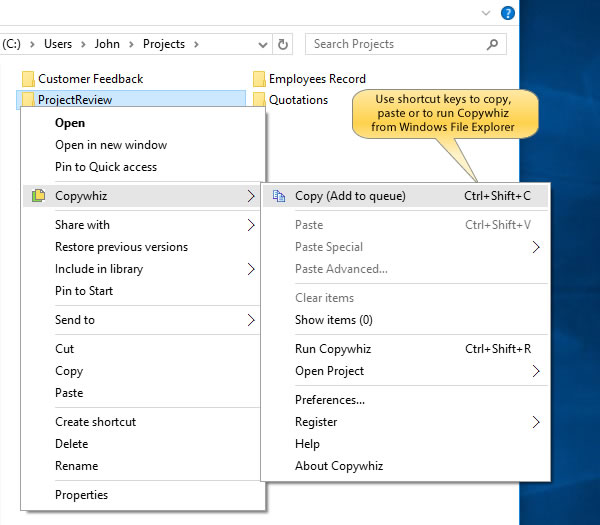
1. Select the files from the Source folder and right-click on it and choose Copywhiz–>Copy as shown below:
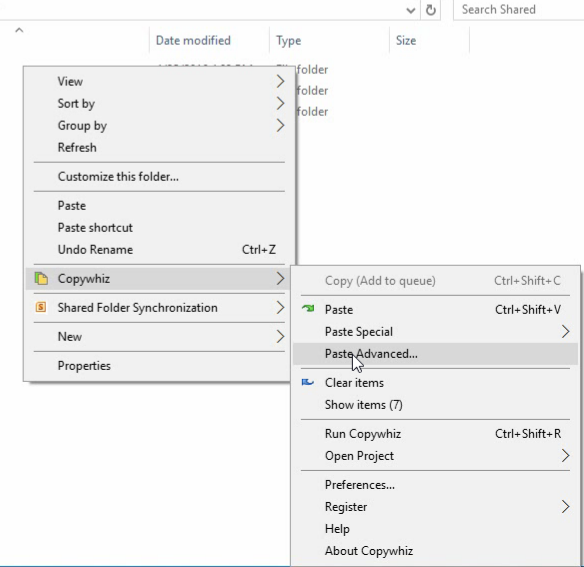
2. Right-click inside the destination folder where you wish to copy the files and select Copywhiz–>Paste Advanced:
3. Copywhiz window will open with the destination folder already selected. You can suffix the destination folder with %date% or %datetime% to add the current date to the folder name.

4. Once the variables are added, click on ‘Paste Now,’ and it will automatically create a new folder based on the current date.
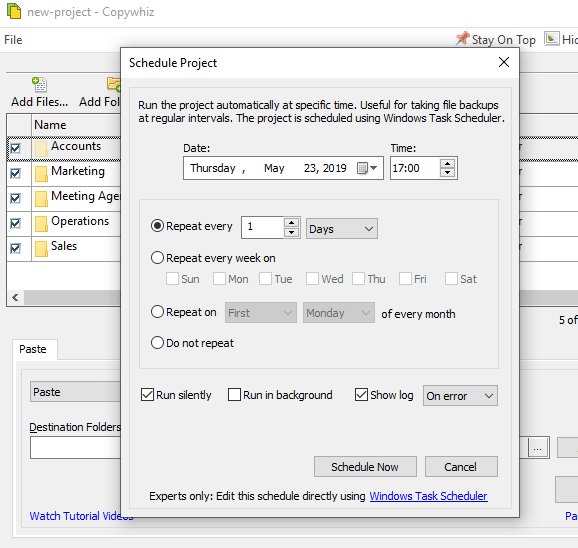
5. You can save the selected files as a Copywhiz project and schedule a backup of the same set of files by clicking on the ‘Paste later (Schedule)’ button.
Once clicked, the following Window will appear that will let you set your preferred backup frequency.
After setting your preferred frequency, click on ‘Schedule Now’ so that Copywhiz automatically runs the projects at a specified time for taking backups.

Conclusion
Copywhiz is an alternative that lets you create a new destination folder (date-wise) for every file backup. This way, you can ensure that multiple versions of your backups are maintained. It uses Windows Task Scheduler to schedule your backups.
Configure Copywhiz to copy files at a particular time. Using Copywhiz’s scheduling capability, you can back up your files every week, every day, or even every hour.
Subscribe to our YouTube channel for more such interesting videos.
Learn more about Copywhiz. Download the free trial from here.
Check out our other cool products.
Have a good day!
Thanks :)

